This is the third part in this series, continuing on from part 1 and part 2. The last post was about integrating the hardware with Hugin and PanoTools. This one is similarly technical, and without any pretty pictures (really, it has no concern at all for aesthetics), so be forewarned.
Thus far (aside from my first stitched image) I’ve been using a raw workflow where possible. That is, all images arrive from the camera in a lossless format, and every intermediate step works in a lossless format. To list out some typical steps in this:
- Acquire raw images from camera with raspistill.
- Convert these to (lossless) TIFFs with dcraw.
- Process these into a composite image with Hugin & PanoTools, producing another lossless TIFF file (for low dynamic range) or OpenEXR file (for high dynamic range).
- Import into something like darktable for postprocessing.
I deal mostly with the first two here.
Acquiring Images
I may have mentioned in the first post that I’m using ArduCam’s Raspberry Pi camera. This board uses a 5-megapixel OmniVision OV5647. (I believe they have another that uses the 8-megapixel Sony OMX 219, but I haven’t gotten my hands on one yet.)
If you are expecting the quality of sensor even an old DSLR camera provides, this board’s tiny, noisy sensor will probably disappoint you. However, if you are accustomed to basically every other camera that is within double the price and interfaces directly with a computer of some kind (USB webcams and the like), I think you’ll find it quite impressive:
- It has versions in three lens mounts: CS, C, and M12. CS-mount and C-mount lenses are plentiful from their existing use in security cameras, generally inexpensive, and generally good enough quality (and for a bit extra, ones are available with electrically-controllable apertures and focus). M12 lenses (or “board lenses”) are… plentiful and inexpensive, at least. I’ll probably go into more detail on optics in a later post.
- 10-bit raw Bayer data straight off the sensor is available (see
raspistill and its
--rawoption, or how picamera does it). Thus, we can bypass all of the automatic brightness, sharpness, saturation, contrast, and whitebalance correction which are great for snapshots and video, but really annoying for composite images. - Likewise via raspistill, we may directly set the ISO speed and the shutter time in microseconds, bypassing all automatic exposure control.
- It has a variety of features pertaining to video, none of which I care about for this application. Go look in picamera for the details.
I’m mostly using the CS-mount version, which came with a lens that is surprisingly sharp. If anyone knows how to do better for $30 (perhaps with those GoPro knockoffs that are emerging?), please tell me.
Reading raw images from the Raspberry Pi cameras is a little more convoluted, and I suspect that this is just how the CSI-2 pathway for imaging works on the Raspberry Pi. In short: It produces a JPEG file which contains a normal, lossy image, followed by a binary dump of the raw sensor data, not as metadata, not as JPEG data, just… dumped after the JPEG data. (Where I refer to “JPEG image” here, I’m referring to actual JPEG-encoded image data, not the binary dump stuck inside something that is coincidentally a JPEG file.)
Most of my image captures were with something like:
raspistill --raw -t 1 -w 640 -h 480 -ss 1000 -ISO 100 -o filename.jpg
That -t 1 is to remove the standard 5-second timeout; I’m not sure
if I can take it lower. -w 640 -h 480 -q 75 applies to the JPEG
image, while the raw data with --raw is always full-resolution; I’m
saving only a much-reduced JPEG as a thumbnail of the raw data, rather
than wasting the disk space and I/O on larger JPEG data than I’ll use.
-ss 1000 is for a 1000 microsecond exposure (thus 1 millisecond),
and -ISO 100 is for ISO 100 speed (the lowest this sensor will do).
Note that we may also remove the -ss option and instead -set to
get lines like:
mmal: Exposure now 10970, analog gain 256/256, digital gain 256/256
mmal: AWB R=330/256, B=337/256
That 10970 is the shutter speed, again in microseconds, according to the camera’s metering. Analog and digital gain relate to ISO, but only somewhat indirectly; setting ISO will result in changes to both, and from what I’ve read, they both equal 1 if the ISO speed is 100.
I just switched my image captures to use picamera rather than
raspistill. They both are fairly thin wrappers on top of the
hardware; the only real difference is that picamera exposes things via
a Python API rather than a commandline tool.
Converting Raw Images
People have already put considerable work into converting these rather strange raw image files into something more sane (as the Raspberry Pi forums document here and here) - like the color tests by John Beale, and 6by9’s patches to dcraw, some of which have made it into Dave Coffin’s official dcraw.
I’ve had to use 6by9’s version of dcraw, which is at https://github.com/6by9/RPiTest/tree/master/dcraw. As I understand it, he’s trying to get the rest of this included into official dcraw.
On an older-revision ArduCam board, I ran into problems getting 6by9’s dcraw to read the resultant raw images, which I fixed with a trivial patch. However, that board had other problems, so I’m no longer using it. (TODO: Explain those problems.)
My conversion step is something like:
dcraw -T -W *.jpg
-T writes a TIFF and passes through metadata -W tells dcraw to
leave the brightness alone; I found out the hard way that leaving this
out would lead to some images with mangled exposures. From here,
dcraw produces a .tiff for each .jpg. We can, if we wish, use all
of that 10-bit range by using -6 to make a 16-bit TIFF rather than
an 8-bit one. In my own tests, though, it makes no difference
whatsoever because of the sensor’s noisiness.
We can also rotate the image at this step, but I prefer to instead add this as an initial roll value of -90, 90, or 180 degrees when creating the PTO file. This keeps the lens parameters correct if, for instance, we already have computed a distortion model of a lens.
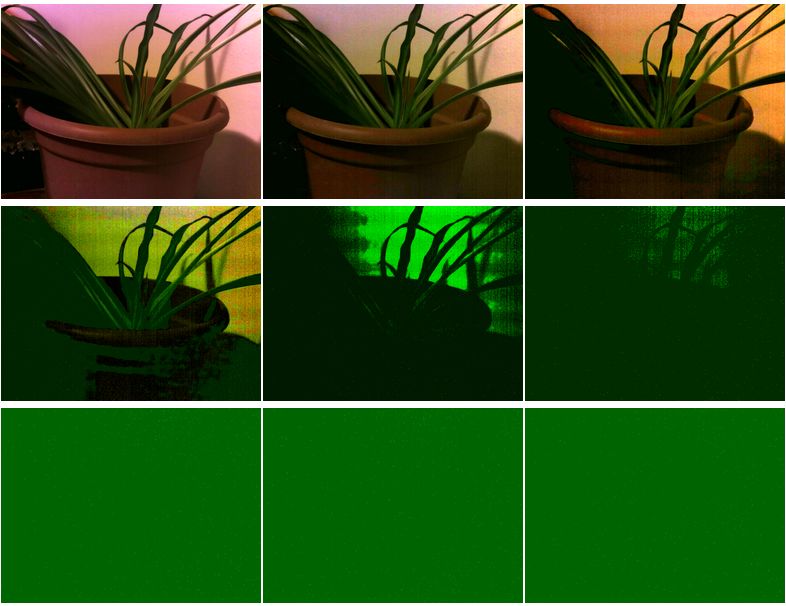
To give an example of the little bit of extra headroom that raw images provide, I took 9 example shots of the same scene, ranging from about -1.0 underexposed down to -9.0 underexposed. The first grid is the full-resolution JPEG image of these shots, normalized - in effect, trying to re-expose them properly:

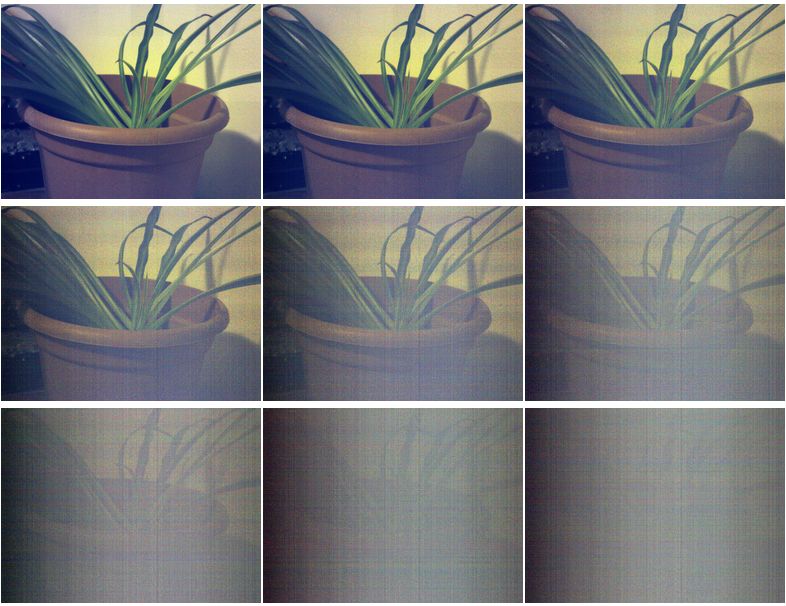
The below contains the raw sensor data, turned to 8-bit TIFF and then again normalized. It’s going to look different than the JPEG due to the lack of whitebalance adjustment, denoising, brightness, contrast, and so on.
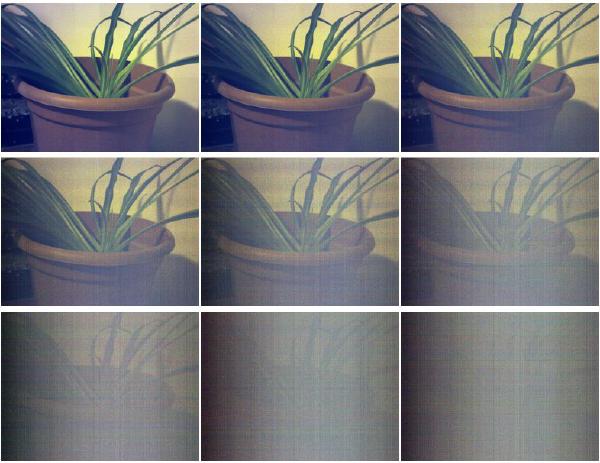
These were done with 16-bit TIFFs rather than 8-bit ones:

In theory, the 16-bit ones should be retaining two extra bits of data from the 10-bit sensor data, and thus two extra stops of dynamic range, that the 8-bit image cannot keep. I can’t see the slightest difference myself. Perhaps those two bits are below the noise floor; perhaps if I used a brighter scene, it would be more apparent.
Regardless, starting from raw sensor data rather than the JPEG image gets some additional dynamic range. That’s hardly surprising - JPEG isn’t really known for its faithful reproduction of darker parts of an image.
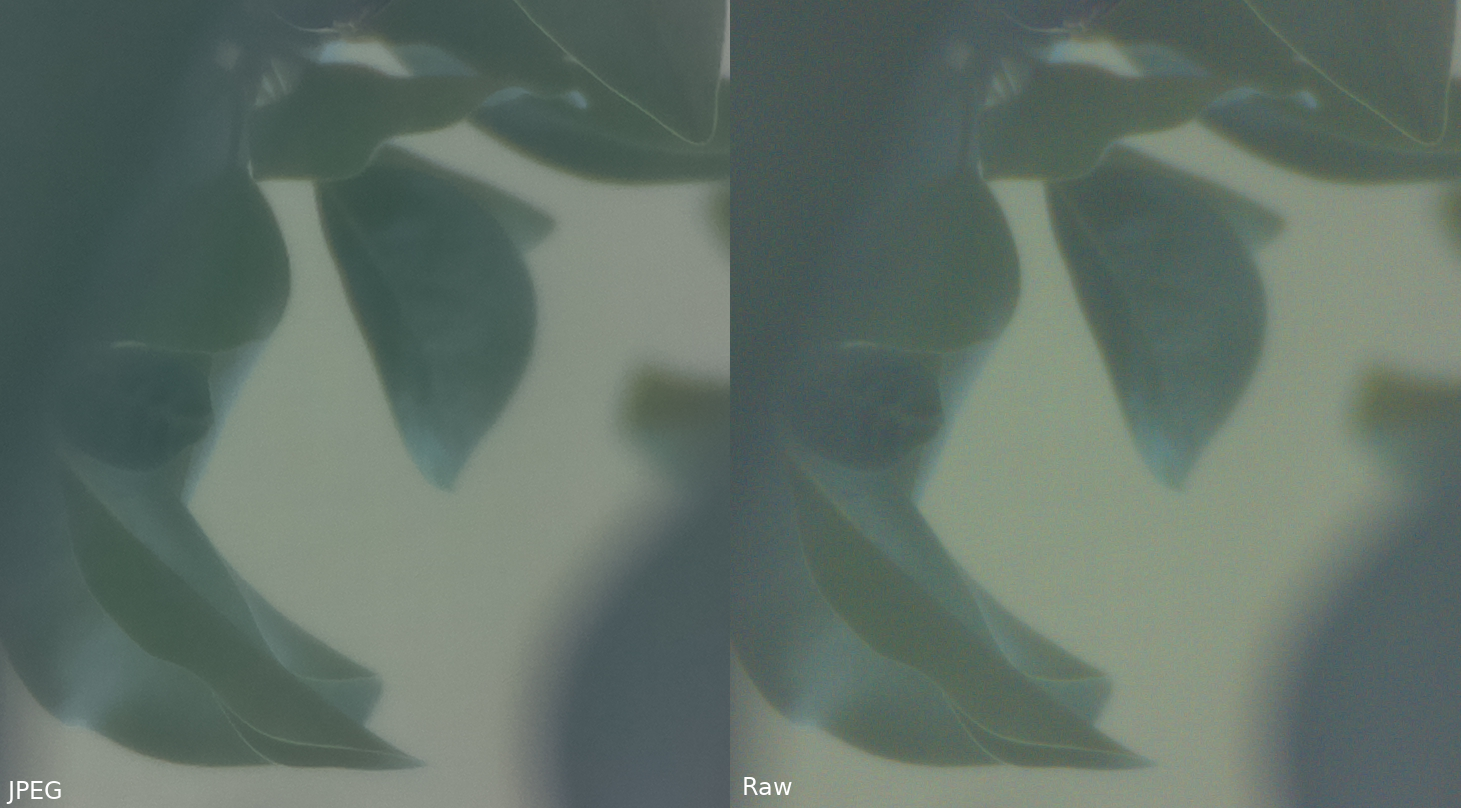
Here’s another comparison, this time a 1:1 crop from the center of an image (shot at 40mm with this lens, whose Amazon price mysteriously is now $146 instead of the $23 I actually paid). Click the preview for a lossless PNG view, as JPEG might eat some of the finer details, or here for the full JPEG file (including raw, if you want to look around).
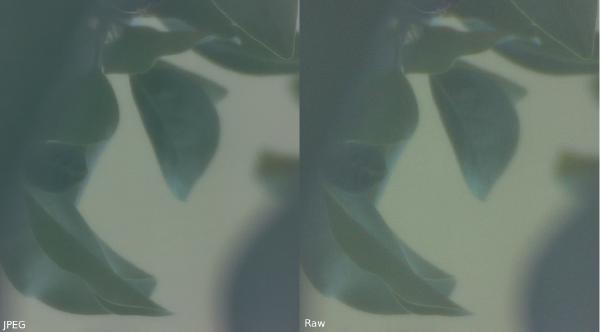
The JPEG image seems to have some aggressive denoising that cuts into sharper detail somewhat, as denoising algorithms tends to do. Of course, another option exists too, which is to shoot many images from the same point, and then average them. That’s only applicable in a static scene with some sort of rig to hold things in place, which is convenient, since that’s what I’m making…
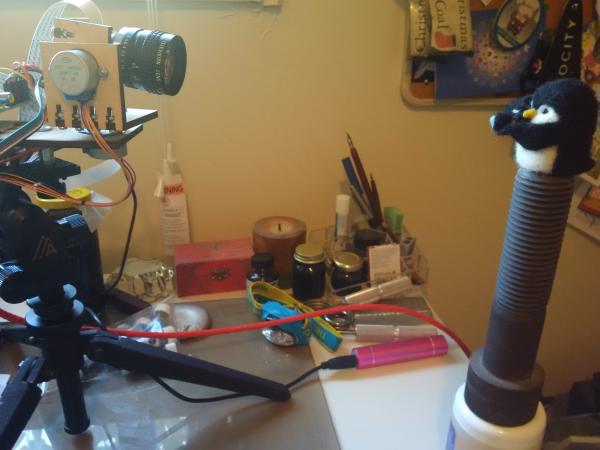
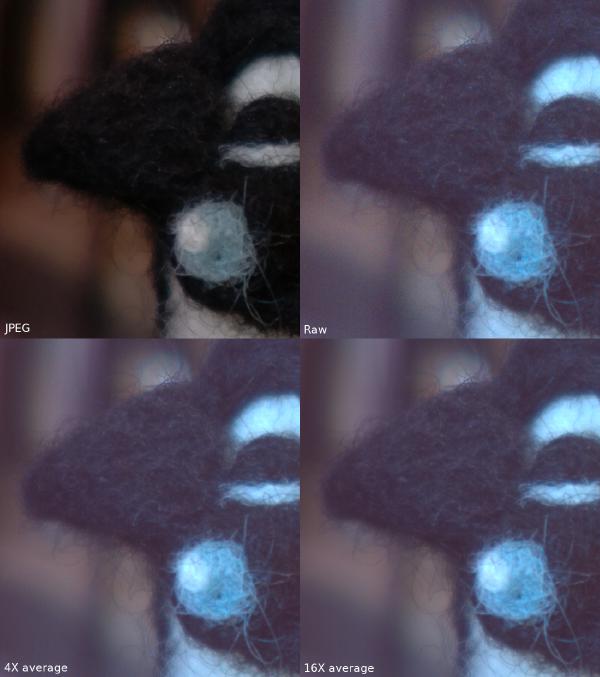
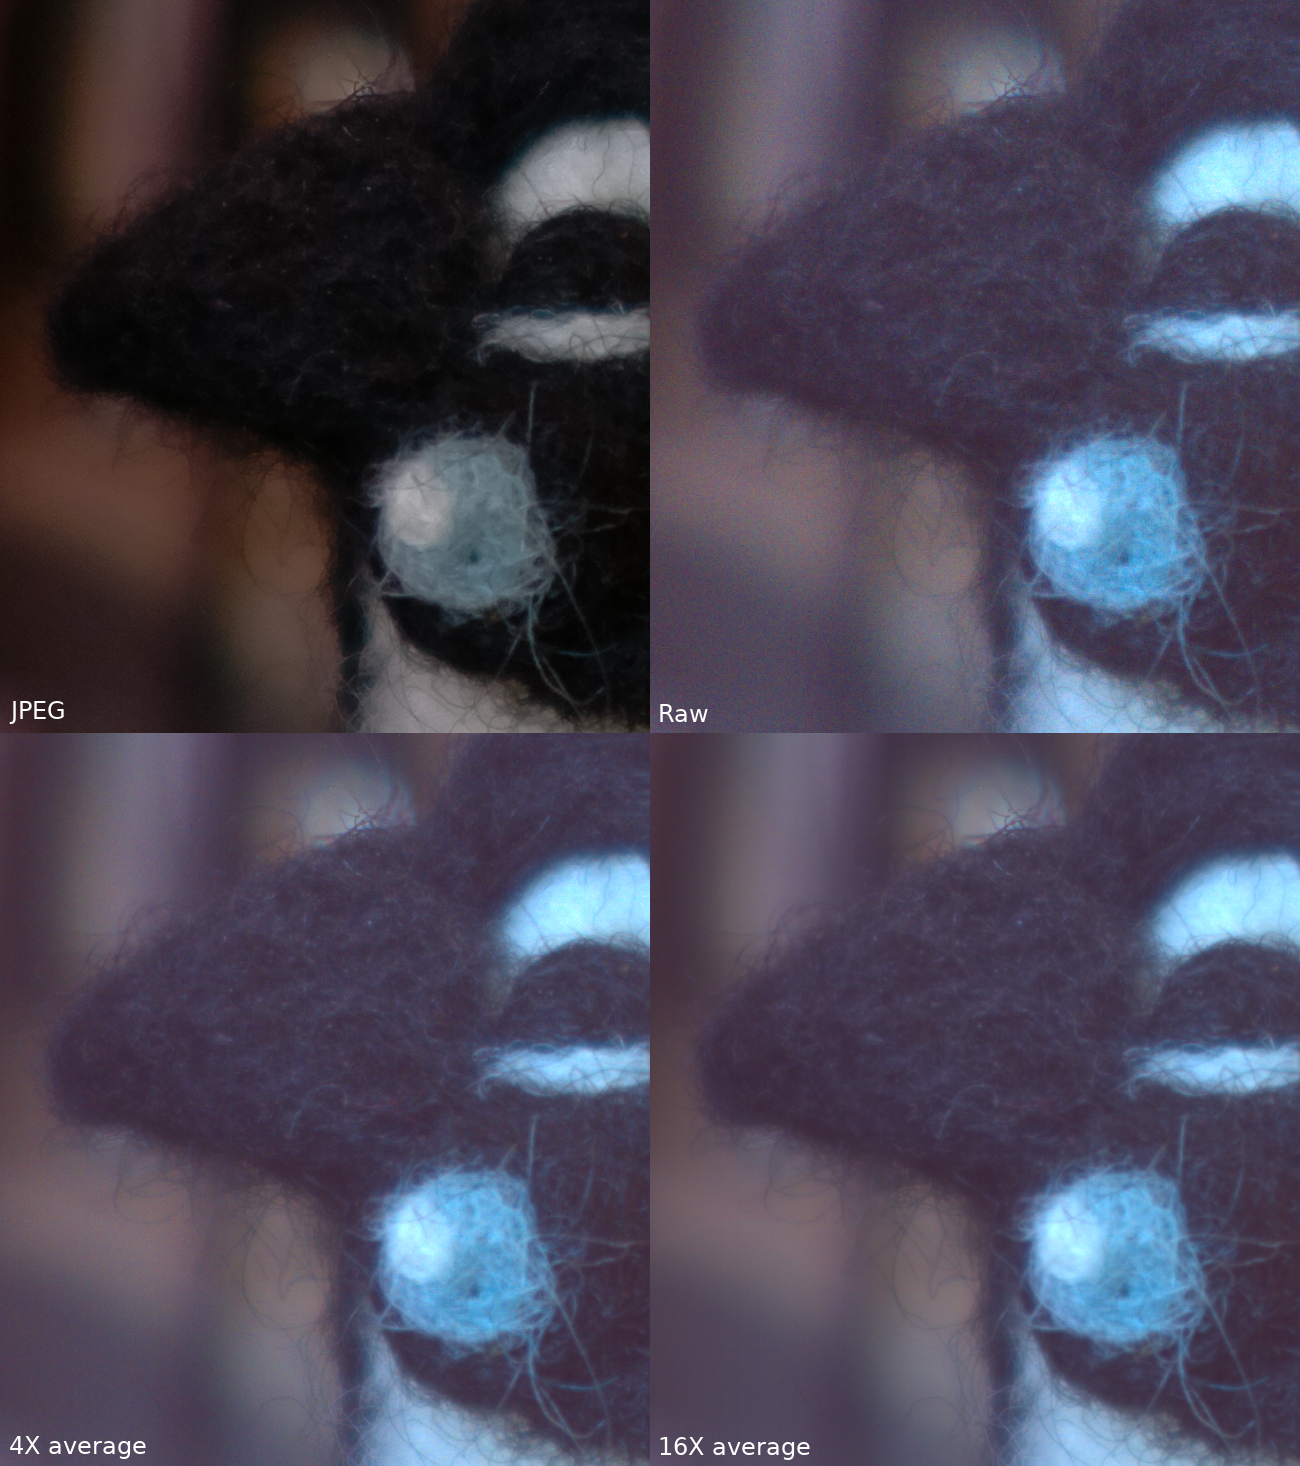
I used that (messy) test setup to produce the below comparison between a JPEG image, a single raw image, 4 raw images averaged, and 16 raw images averaged. These are again 1:1 crops from the center to show noise and detail.
Click for the lossless version, and take a look around finer details. 4X averaging has clearly reduced the noise from the un-averaged raw image, and possibly has done better than the JPEG image in that regard while having clearer details. The 16X definitely has.
Averaging might get us the full 10 bits of dynamic range by cleaning up the noise. However, if we’re able to shoot enough images at exactly the same exposure to average them, then we could also shoot them at different exposures (i.e. bracketing), merge them into an HDR image (or fuse them), and get well outside of that limited dynamic range while still having much of that same averaging effect.
I’ll cover the remaining two steps I noted - Hugin & PanoTools stitching and HDR merging, and postprocessing - in the next post.