Earlier this year I was turning around ideas in my head - perhaps inspired by Dr. Essa’s excellent class, CS6475: Computational Photography - about the possibility of making an inexpensive, relatively turn-key rig for creating very high-detail photographs, ideally in HDR, and taking advantage of algorithms, automation, and redundancy to work with cheap optics and cheap sensors. What I had in mind had a pretty commonly-seen starting point for making panoramas - something like a telephoto lens mounted on a pan-tilt gimbal, and software behind it responsible for shooting the right pattern of photographs, handling correct exposures, capturing all the data, and stitching it.
My aim wasn’t so much to produce panoramas as it was to produce very high-detail images, of which panoramas are one type. I’d like it to be possible for narrow angles of view too.
Most of my thoughts landed at the same inevitable view that this would require lots of custom hardware and electronics, and perhaps from there still may need a mobile app to handle all of the heavy computations.
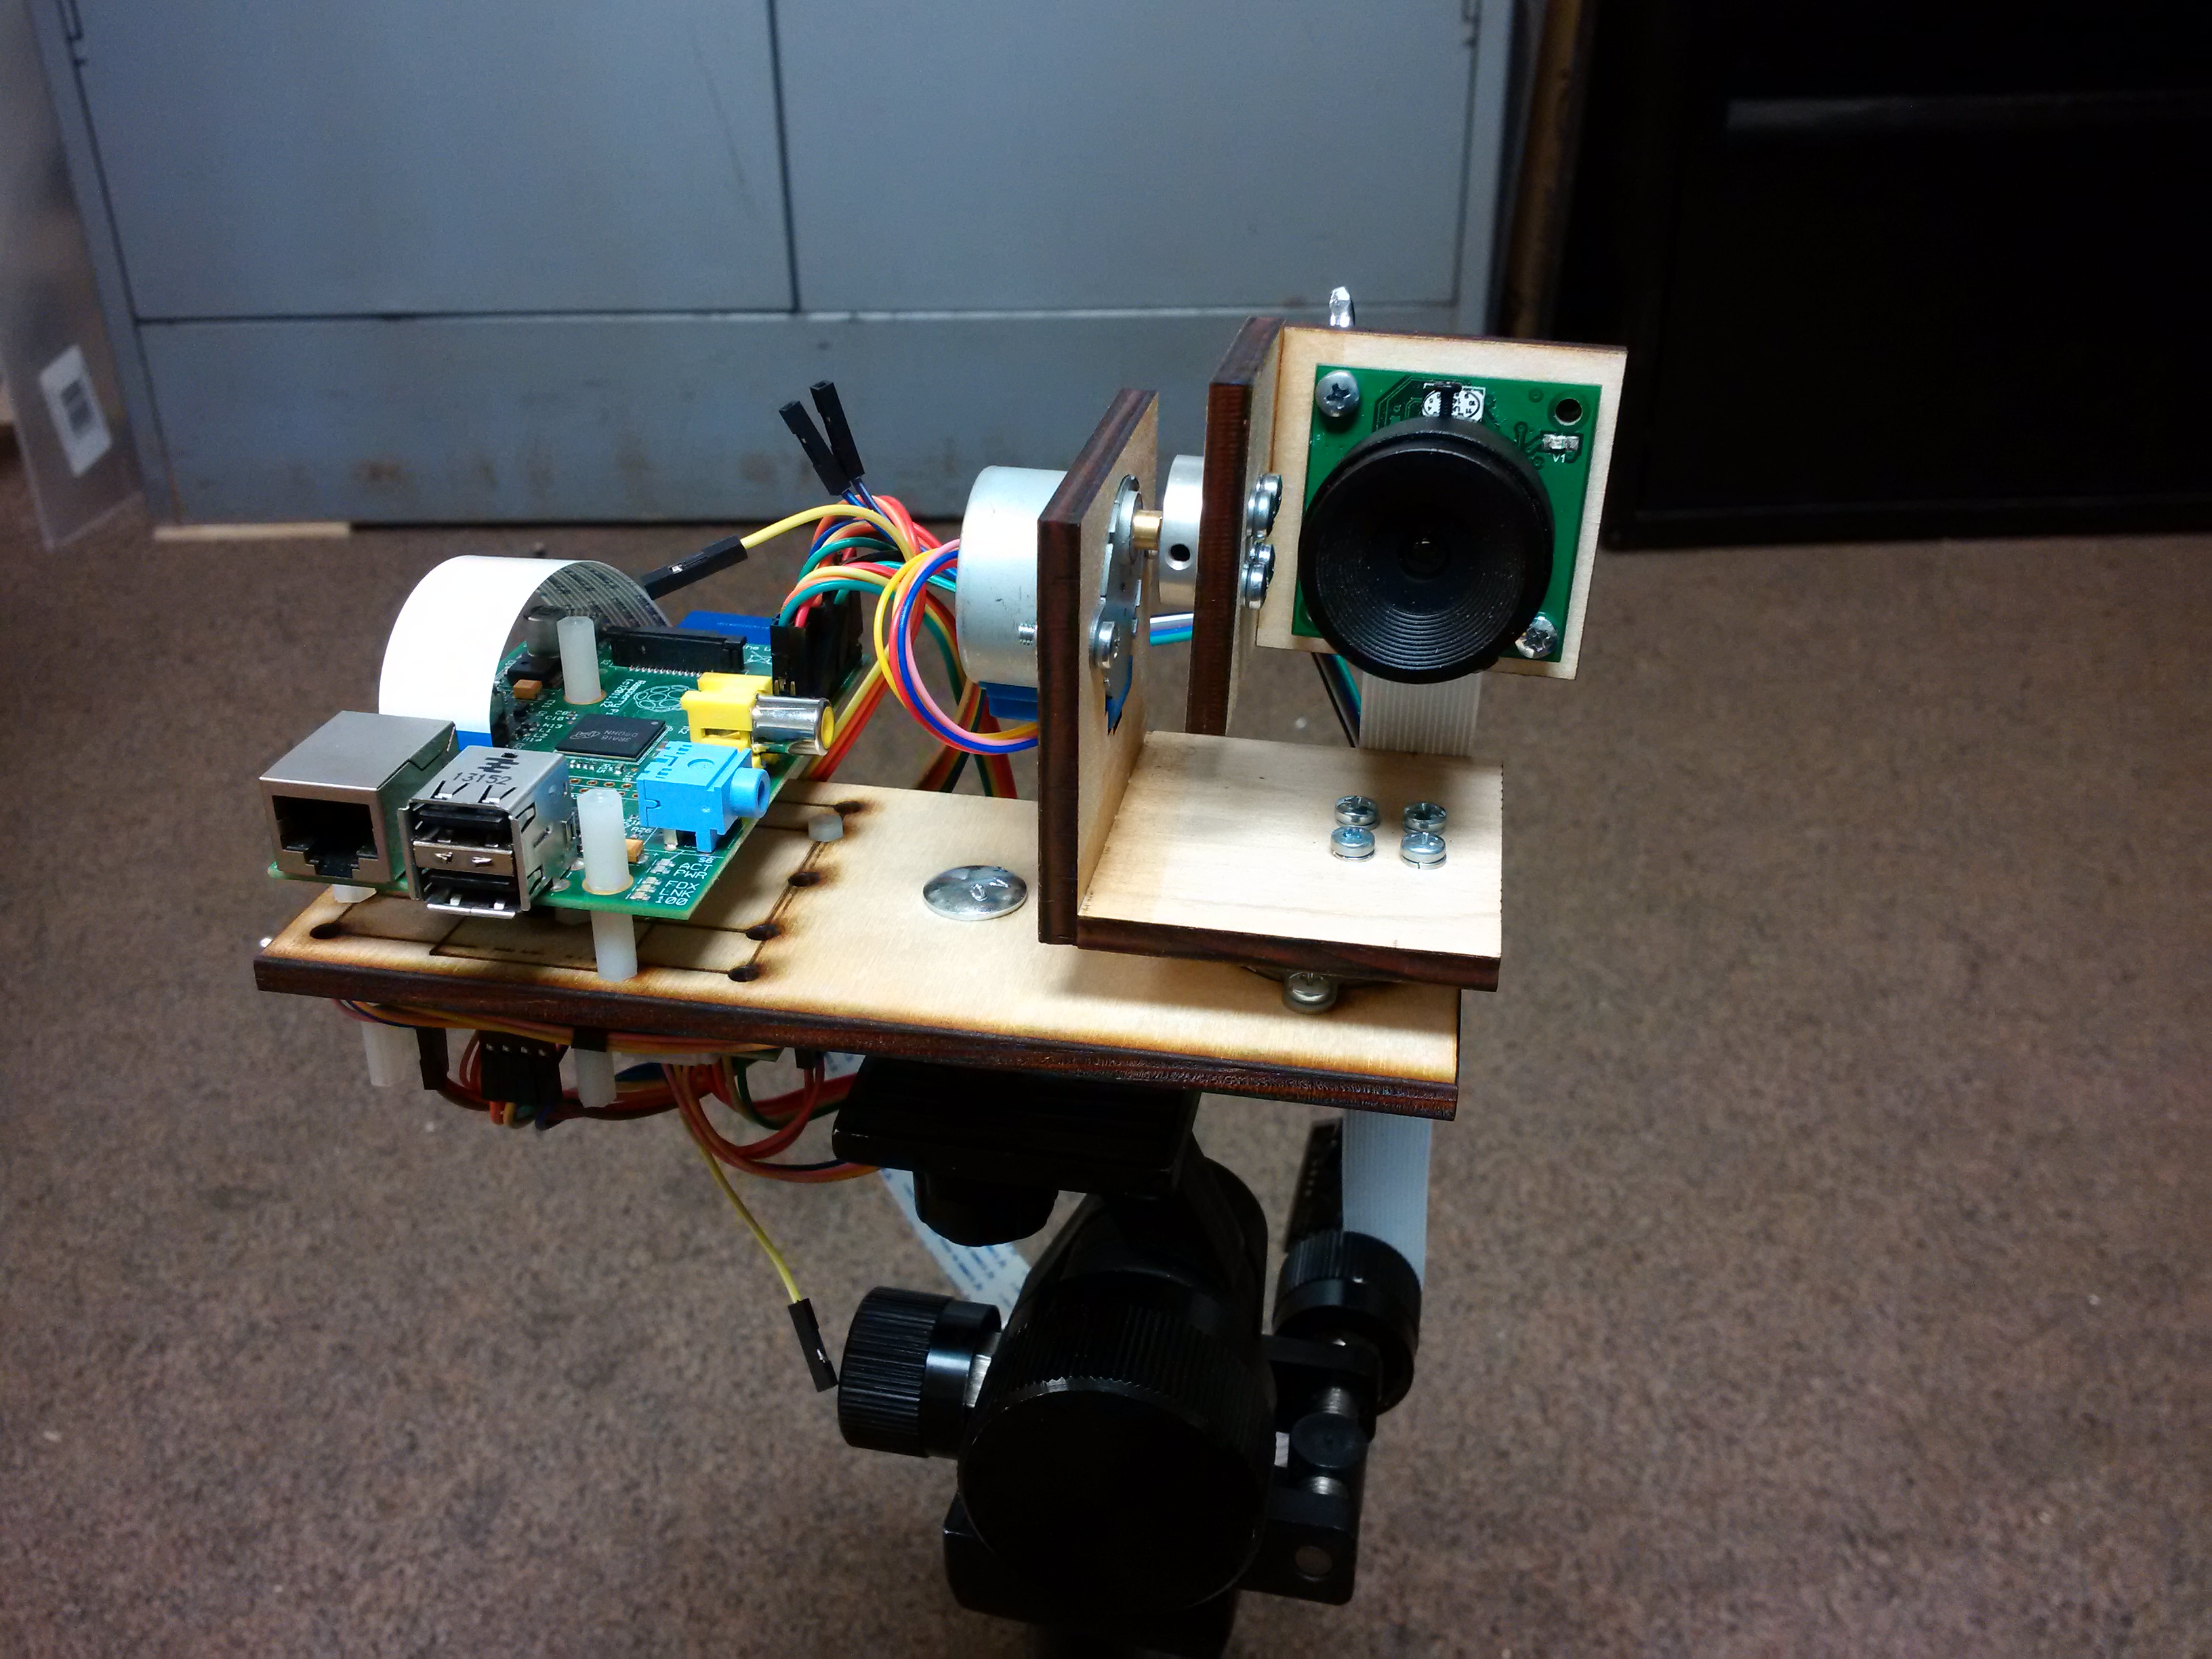
Interestingly, this whole time I had several Raspberry Pis, an ArduCam board, work history that familiarized me with some of the cheaper M12 & CS mount lenses of the telephoto variety, and access to a hackerspace with laser cutters and CNCs. Eventually, I realized the rather obvious idea that the Pi and ArduCam would probably do exactly what I needed.
A few other designs (like this and this) offered some inspiration, and after iterating on a design a few times I eventually had something mostly out of laser-cut plywood, hardware store parts, and cheap steppers. It looks something like this, mounted on a small tripod:
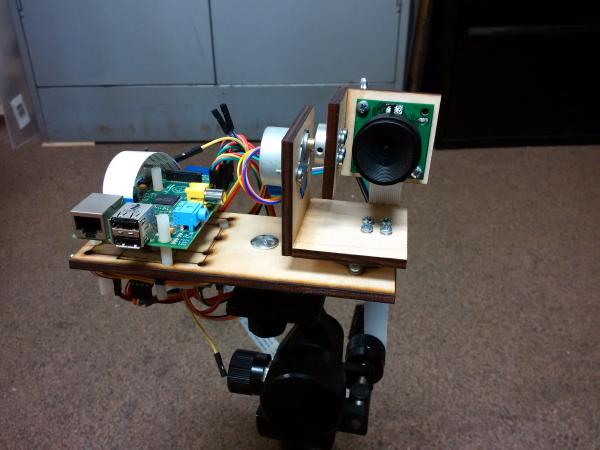
I am able to move the steppers thanks to Matt’s code and
capture images with raspistill. The arrangement here provides two
axes, pitch and yaw (or, pan and tilt). I put together some code to
move the steppers in a 2D grid pattern of a certain size and number of
points. (Side note: raspistill can
capture 10-bit raw Bayer data with the --raw
option, which is very nice. I’m not doing this yet, however.)
Here’s a video of it moving in such a pattern (to speed things along, image capture was replaced by a 1/2 second delay at each point):
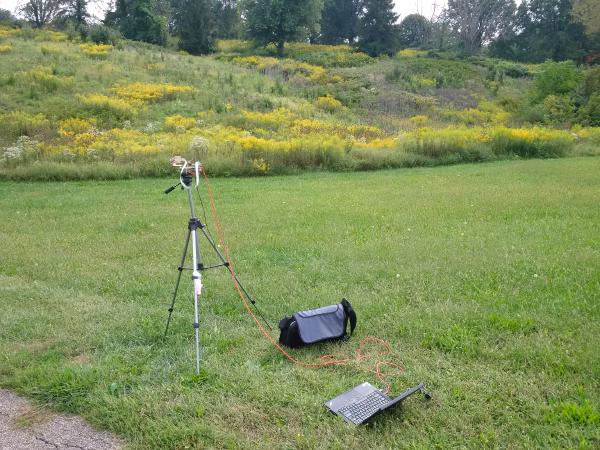
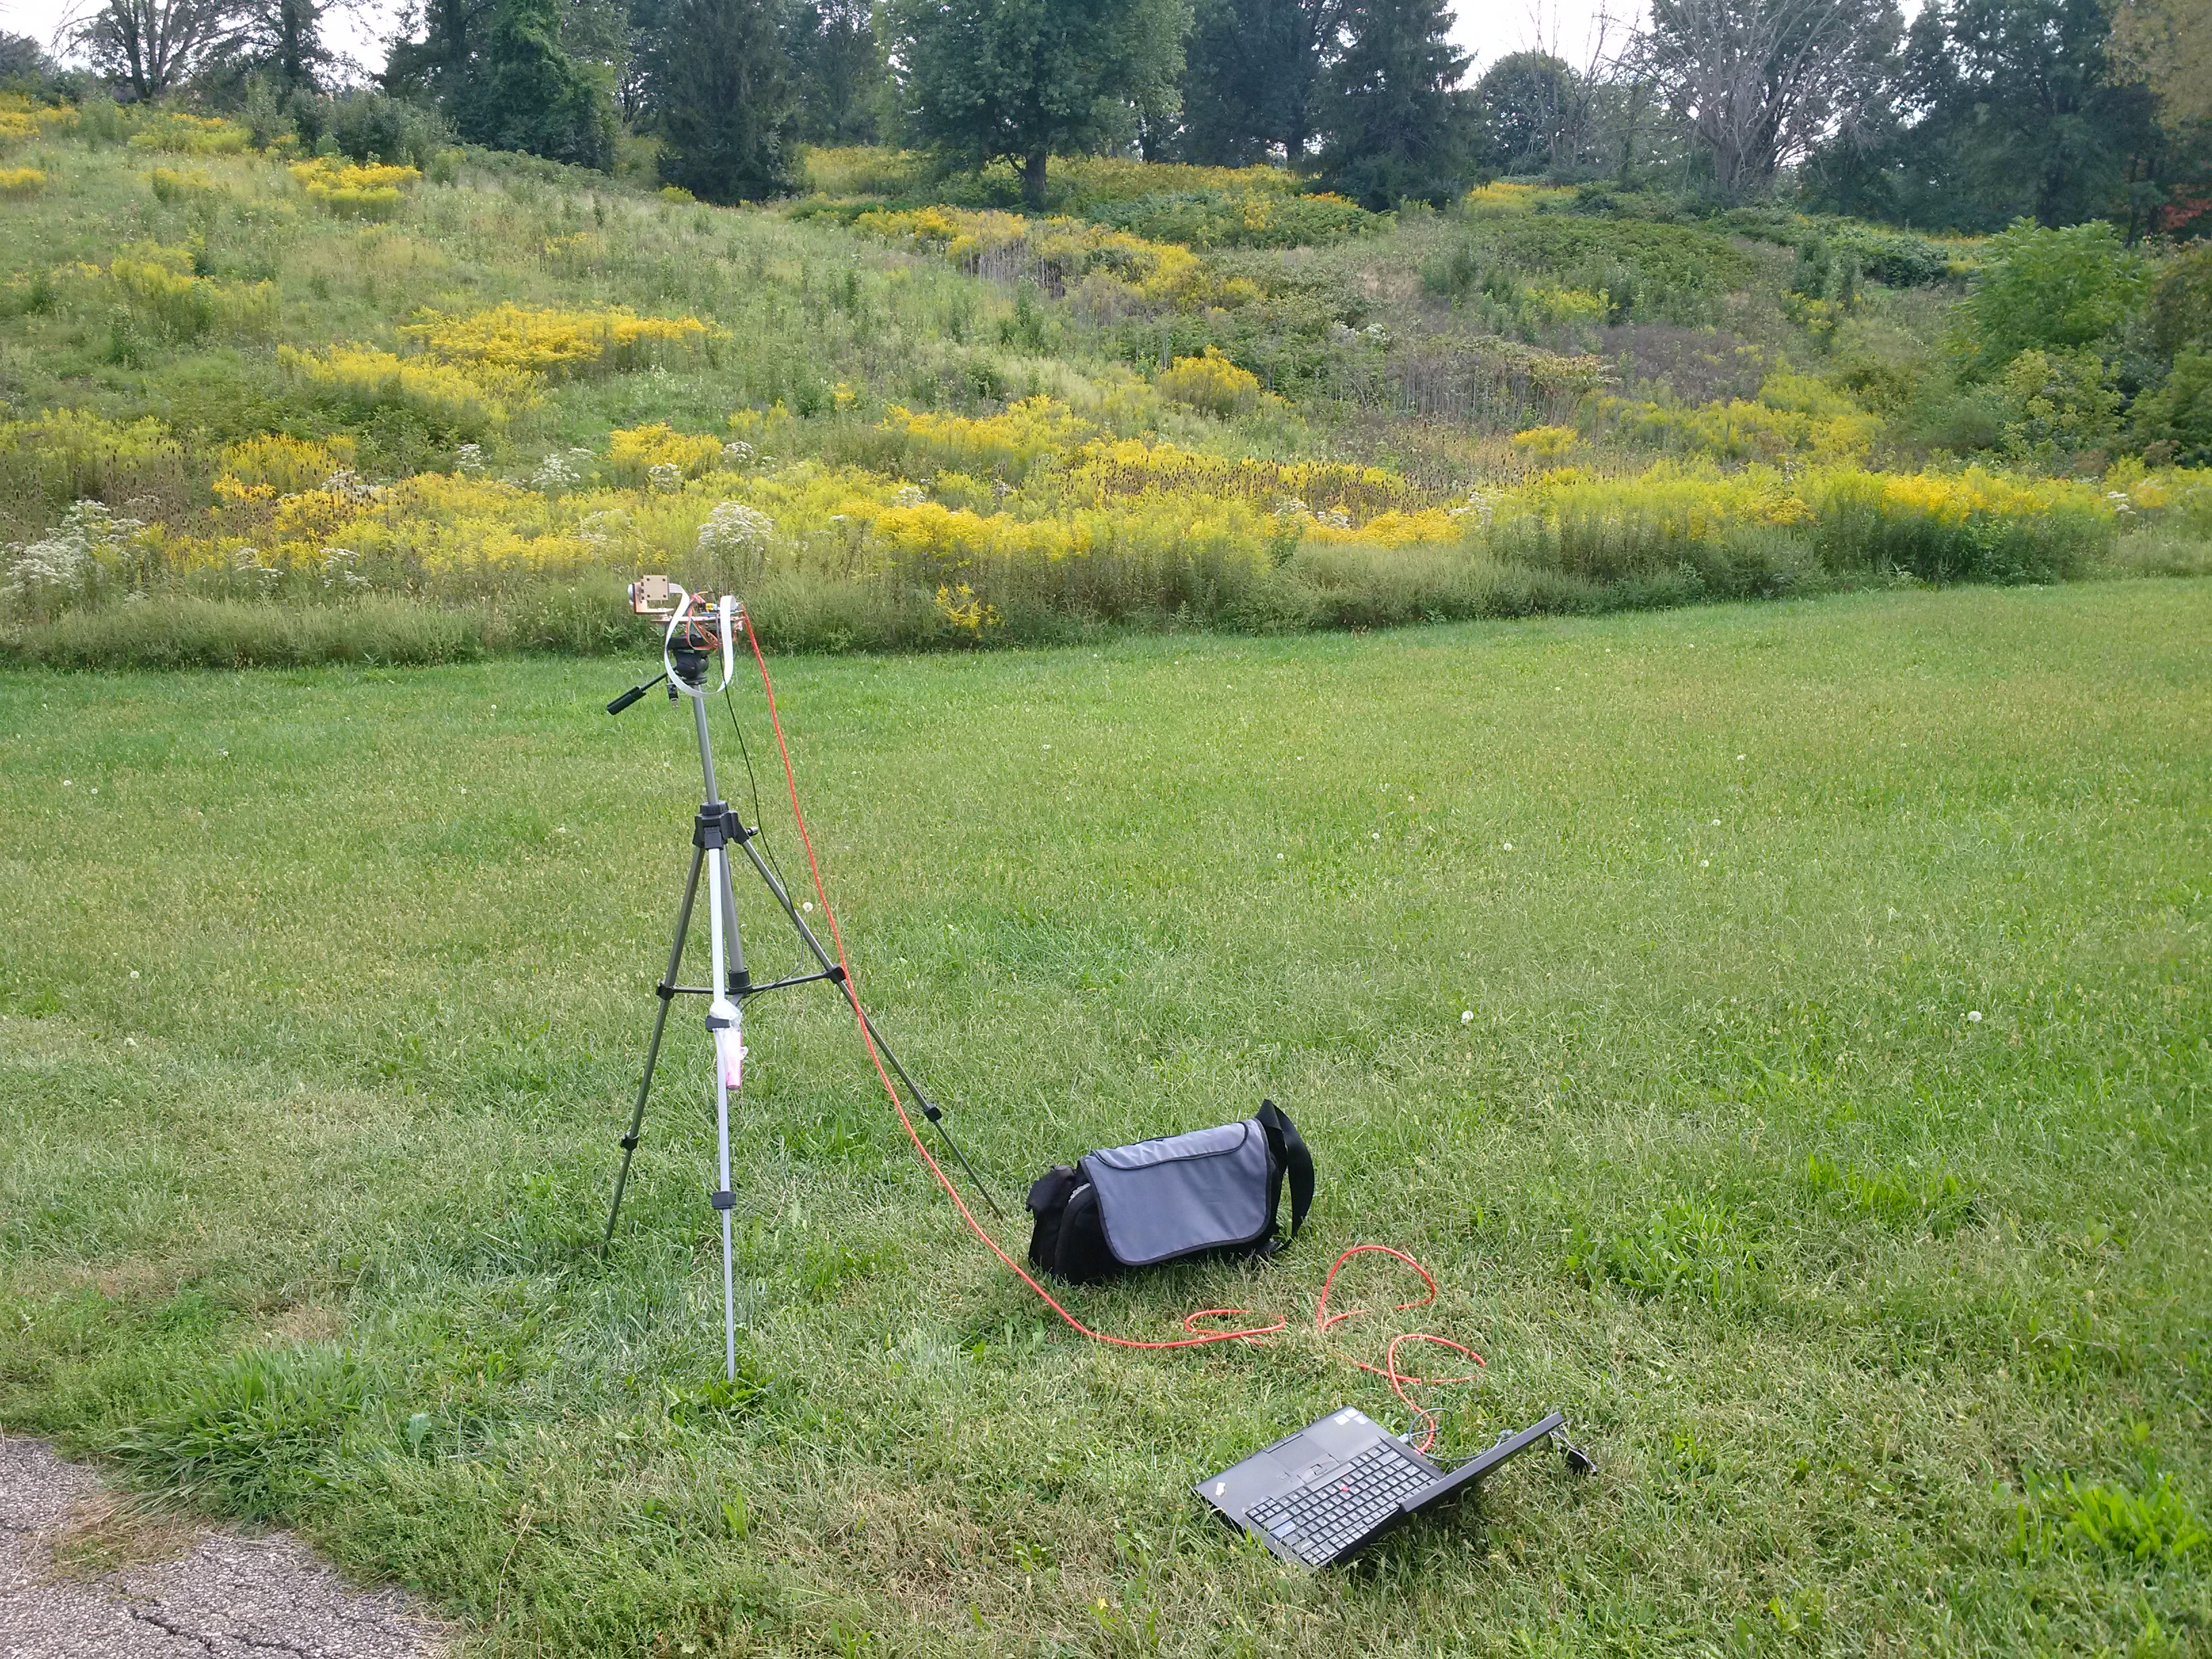
It’s still rather rough to use, but it worked well enough that I picked up a 25mm M12 lens - still an angle of view of about 10 degrees on this sensor - and set it up in the park for a test run:
(Later note: I didn’t actually use the 25mm lens on that shot. I used a 4mm (or something) lens that looks pretty much the same, and didn’t realize it until later. It’s a wonder that Hugin was able to stitch the shots at all.)
The laptop is mainly there so that I can SSH into the Pi to control things and to use RPi-Cam-Web-Interface to focus the lens. The red cord is just Cat 6 connecting their NICs together; the Pi is running off of battery here. If I had a wireless adapter on hand (or just a Raspberry Pi 3) I could probably have just set up a WiFi hotspot from the Pi and done all this from a phone.
I collected 40 or 50 images as the stepper moved through the grid. While I fixed the exposure and ISO values with raspistill, I didn’t attempt any bracketing for HDR, and I left whitebalance at whatever the camera module felt like doing, which almost certainly varied from picture to picture. Automatic whitebalance won’t matter when I start using the raw Bayer data, but for the first attempt at stitching, I used only the JPEGs which already had whitebalance applied.
I stitched everything in Hugin on my desktop PC. I would like to eventually make stitching possible just on the Raspberry Pi, which isn’t that farfetched considering that I stitched my first panoramas on a box that wasn’t much more powerful than a Pi. I also had to get rid of some of the images because for whatever reason Hugin’s optimization was failing when they were present. However, being able to look at Hugin’s computed pitch, yaw, and roll values and see everything lining up nicely with the motion of the steppers is a good sign.
The first results look decent, but fuzzy, as $10 optics are prone to produce:

Follow along to part 2.